As there were recent news about the PGS and the SmachZ, I thought it's time to finally tell you that I've scammed you all as well 
Naaah, just kidding.
There are two reasons it took so long from the last one to this newspost:
Well, now's the time to do it
Regarding the keymat:
The new samples have arrived in Austria two days ago and are already on the way to me, together with the new DPads.
This will probably the final one!

And yes, it's all white!
Why? Here's the answer:
You probably remember that we need multiple colors for the keymat: White, orange and black.
The lowest layer was the white one (to diffuse the backlight), then we had black on top and the orange only on the keys.
These two paint layers made the keymat thick and very stiff.
So it was modified to only have one full layer of paint (the black one) and the white and orange one just on the keys.
That made the keymat work perfect (it's the one that's currently making the rounds in the community) - but with the white layer missing, the backlight wasn't as nice as before (some keys received more light than others).
The simple solution was to put the white paint onto the full keymat and black and orange only on the keys where needed.
Easy change, huge improvement.
I'll let you know about the DPad as soon as I receive the keymat for testing
All the small things I did...
I'll try to remember all the small things I did...
First some good news:
I didn't plan to include an AC Adaptor, but I found a good one with 2,5A and world-wide plugs for a good price. So you will most probably receive an AC Adaptor with your Pyra!
Shoulder buttons
Then I was working on the shoulder buttons. You know, they mostly worked on the latest case revision, but still not as good as I want them (which mostly has to do with tolerance issues).
I wanted to make sure they get it right this time, so I grabbed the 3D data files to explain exactly how needs to be taken care of.
It's simple and logical, but it still took some time to measure all of this and write it down.
I think nothing can go wrong with these instructions now... but take a look at it, if you like:
View attachment Shoulder Buttons Analysis.pdf
Sealing
Next, I was working on the sealing. The idea with the silicon pads was good in theory - but not working that well in reality.
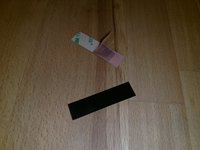
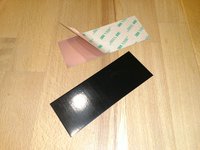
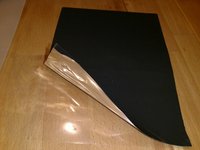
It looks the only way to properly seal the speakers is with some pre-cut adhesive tape which seals everything except the contacts.
Even though it looks simple, it also took a while to measure everything properly, to make sure it sits perfect. Here is the result:

I will hand-cut this within the next few days to test it!
Next up: Cooling solutions!
Well, some good news first: ptitSeb has played around with his prototype a bit.
The unit doesn't have ANY cooling solution installed.
Doing processor-intensive stuff (like compiling) does heat up the unit quite a bit. That was to be expected, since it doesn't even throttle yet (unlike all smartphones or other devices with modern processors).
It mostly heats up between the nubs though, the DPad and button area stays cool.
And while doing normal stuff or playing games, the unit normally stays cool (unless the game needs 100% CPU...)
Still, we want to throttle as little as possible, ideally never (which is unlikely though).
So, a simple solution to cool things down a bit would be ideal, so I started sourcing existing parts.
I've planned two things:
Regarding 1.:
We've got 19x12x5mm space below the USB Port. There are existing 12x13x5mm heatsinks (for DDR RAMs) available. I also found a 12x18x5mm heatsink for power transistors, which would work as well.
I also found self-adhesive material stripes. These can go directly between the CPU and mainboard and move the heat away onto the heatsink (which is not far away).

A larger pad like these (also with copper material) can be used between the CPU board and the battery.


We will also add a few venting holes below the USB port. No worries, the mold doesn't need to be changed for that - an inlay for the mold will be created for that.
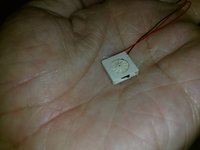
I even found a small fan that fits there. While I'm not really planning right now adding one there, the case will be prepared for that in case future CPU boards might need one - or in case someone wants to mod a fan into his unit
I got one, just for fun. Isn't it cute?

For normal operation, the heatsink solution should work fine.
I've got all parts except for the heatsink yet. As soon as that one arrives, I'll assemble one unit with all these changes and see how well it works.
As these are ALL existing parts and nothing custom made, we can get them without any problems within a few days
And finally: Software development
Since a few devs have now units, it was time to organize the software development and set up a proper platform for that.
Therefore, I've installed GitLab on our dev site: https://dev.pyra-handheld.com/
You'll find the gits for all our custom debian packages there as well as the kernel, the source code to the repo and more stuff.
It also has an issue-tracker built-in, so once the Pyra has been released, you can use it to post any issues you find or post feature requests.
You can also join projects and provide patches as well.
Everyone is welcome to help - check #dragonbox-dev and #dragonbox-pyra on Freenode IRC if you're a dev and want to help!
Not all tasks require a unit.
Kernel-Hackers welcome!
While help with the OS is important, it's also important that drivers are being written for all the hardware.
For example, the battery monitor chip needs to be programmed so that it knows everything about our battery, the ABE drivers would need to be ported from an older kernel the the current one and so on.
Anyone here who has experience with that? Please do contact me if you have experience and do have time!
So, that's for todays post.
I probably have forgotten half of what I did - but simply ask questions in case something is unclear or you want to know something else.
Naaah, just kidding.
There are two reasons it took so long from the last one to this newspost:
- Like you, we were mostly playing the waiting game: Waiting for parts I ordered (to test cooling solutions) or waiting for new samples (like the keymat).
- I've been busy with a lot small tasks and setups that I didn't find the time to summarize everything up and post it.
Well, now's the time to do it
Regarding the keymat:
The new samples have arrived in Austria two days ago and are already on the way to me, together with the new DPads.
This will probably the final one!

And yes, it's all white!
Why? Here's the answer:
You probably remember that we need multiple colors for the keymat: White, orange and black.
The lowest layer was the white one (to diffuse the backlight), then we had black on top and the orange only on the keys.
These two paint layers made the keymat thick and very stiff.
So it was modified to only have one full layer of paint (the black one) and the white and orange one just on the keys.
That made the keymat work perfect (it's the one that's currently making the rounds in the community) - but with the white layer missing, the backlight wasn't as nice as before (some keys received more light than others).
The simple solution was to put the white paint onto the full keymat and black and orange only on the keys where needed.
Easy change, huge improvement.
I'll let you know about the DPad as soon as I receive the keymat for testing
All the small things I did...
I'll try to remember all the small things I did...
First some good news:
I didn't plan to include an AC Adaptor, but I found a good one with 2,5A and world-wide plugs for a good price. So you will most probably receive an AC Adaptor with your Pyra!
Shoulder buttons
Then I was working on the shoulder buttons. You know, they mostly worked on the latest case revision, but still not as good as I want them (which mostly has to do with tolerance issues).
I wanted to make sure they get it right this time, so I grabbed the 3D data files to explain exactly how needs to be taken care of.
It's simple and logical, but it still took some time to measure all of this and write it down.
I think nothing can go wrong with these instructions now... but take a look at it, if you like:
View attachment Shoulder Buttons Analysis.pdf
Sealing
Next, I was working on the sealing. The idea with the silicon pads was good in theory - but not working that well in reality.
It looks the only way to properly seal the speakers is with some pre-cut adhesive tape which seals everything except the contacts.
Even though it looks simple, it also took a while to measure everything properly, to make sure it sits perfect. Here is the result:

I will hand-cut this within the next few days to test it!
Next up: Cooling solutions!
Well, some good news first: ptitSeb has played around with his prototype a bit.
The unit doesn't have ANY cooling solution installed.
Doing processor-intensive stuff (like compiling) does heat up the unit quite a bit. That was to be expected, since it doesn't even throttle yet (unlike all smartphones or other devices with modern processors).
It mostly heats up between the nubs though, the DPad and button area stays cool.
And while doing normal stuff or playing games, the unit normally stays cool (unless the game needs 100% CPU...)
Still, we want to throttle as little as possible, ideally never (which is unlikely though).
So, a simple solution to cool things down a bit would be ideal, so I started sourcing existing parts.
I've planned two things:
- Move the heat away from the CPU to some heatsink.
- Spread the heat and shield it from the battery.
Regarding 1.:
We've got 19x12x5mm space below the USB Port. There are existing 12x13x5mm heatsinks (for DDR RAMs) available. I also found a 12x18x5mm heatsink for power transistors, which would work as well.
I also found self-adhesive material stripes. These can go directly between the CPU and mainboard and move the heat away onto the heatsink (which is not far away).

A larger pad like these (also with copper material) can be used between the CPU board and the battery.


We will also add a few venting holes below the USB port. No worries, the mold doesn't need to be changed for that - an inlay for the mold will be created for that.
I even found a small fan that fits there. While I'm not really planning right now adding one there, the case will be prepared for that in case future CPU boards might need one - or in case someone wants to mod a fan into his unit
I got one, just for fun. Isn't it cute?

For normal operation, the heatsink solution should work fine.
I've got all parts except for the heatsink yet. As soon as that one arrives, I'll assemble one unit with all these changes and see how well it works.
As these are ALL existing parts and nothing custom made, we can get them without any problems within a few days
And finally: Software development
Since a few devs have now units, it was time to organize the software development and set up a proper platform for that.
Therefore, I've installed GitLab on our dev site: https://dev.pyra-handheld.com/
You'll find the gits for all our custom debian packages there as well as the kernel, the source code to the repo and more stuff.
It also has an issue-tracker built-in, so once the Pyra has been released, you can use it to post any issues you find or post feature requests.
You can also join projects and provide patches as well.
Everyone is welcome to help - check #dragonbox-dev and #dragonbox-pyra on Freenode IRC if you're a dev and want to help!
Not all tasks require a unit.
Kernel-Hackers welcome!
While help with the OS is important, it's also important that drivers are being written for all the hardware.
For example, the battery monitor chip needs to be programmed so that it knows everything about our battery, the ABE drivers would need to be ported from an older kernel the the current one and so on.
Anyone here who has experience with that? Please do contact me if you have experience and do have time!
So, that's for todays post.
I probably have forgotten half of what I did - but simply ask questions in case something is unclear or you want to know something else.


