bacteria
Modder & Portablizer
As promised, this is the first of two GP2x projects, which will be catalogued here.
This project takes a fully working GP2x, will implement a d-pad, the case will be resprayed, the back of the case will be modded to take a li-ion cell and recharge jack.
This project will be sold, or at least offered for sale when finished, and a percentage of that will go to Dave18 as he donated his working but broken GP2x F200 to me, which i'll use for Project 2. Dave18 didn't want anything for his system, I thought however it only fair to give him a piece of the profit from the sale on this unit!
The F200 (Project 2) will be for my own use, so will keep it.
So, onto the guide. I'm going to make it easy to follow so others can hopefully copy the work.
In saying that, some parts like opening up the system are pretty straightforward and been covered other times on this forum.
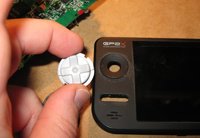
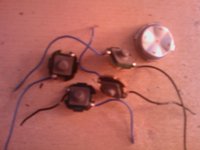
Using one of these dpads, got it ages ago from a generic controller. D-pad crosses are usually crosses, however some are on circular blocks like this one.
If you use a normal d-pad cross, a good idea would be to cut out the hole for the cross to go through and move about freely inside, cut the perimeter of the section into a circle, and mount on top of the GP2x case - or of course you could make it integrated and use filler, etc.
Good d-pad crosses are ones from GameCube, Gameboy, Gameboy mini, or as a maximum size, from a NES controller.
I selected the d-pad below from my small box of d-pads as it was just the right size, could retain GP2x case and just cut out the circular hole the old joystick came from, cutting close to the edge of the raised outer part.

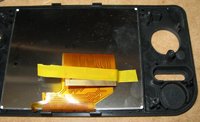
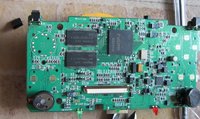
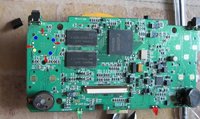
So, the GP2x was opened carefully, buttons removed, and the ribbon cable to the screen removed by gently lifting the edge of the brown plug holding the ribbon in place on the GP2x board, using edge of thumb nail - be gentle. The ribbon was then gently attached to the back of the screen with a thin piece of electrical tape so it can be removed easily - point is to protect the ribbon cable from damage. The other reason to separate the screen from the motherboard is so it is easy to remove the joystick and build a replacement d-pad area (with rubber topped tact switches).
Removed the "T" shaped small plastic piece above the cut-out circle as not needed and gets in the way.

Decided not to remove the perspex screen at the front of the case so as not to introduce dust to the screen, also, the case will be spray painted metallic black, so may as well just use electrical tape to protect the screen from the paint when I get to that stage.
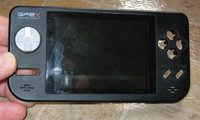
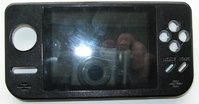
Here are two pics of the d-pad in place. D-pad looks nice and moves freely. The d-pad will also be spray painted in metallic black of course.


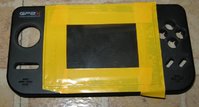
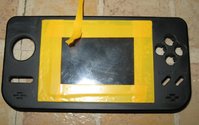
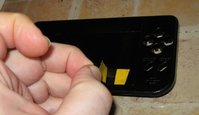
Before the case is spray painted, going to tape over the screen, and give the case outer a quick and light sanding, to remove any light scratches and also help the spray paint make good on the case.
This project takes a fully working GP2x, will implement a d-pad, the case will be resprayed, the back of the case will be modded to take a li-ion cell and recharge jack.
This project will be sold, or at least offered for sale when finished, and a percentage of that will go to Dave18 as he donated his working but broken GP2x F200 to me, which i'll use for Project 2. Dave18 didn't want anything for his system, I thought however it only fair to give him a piece of the profit from the sale on this unit!
The F200 (Project 2) will be for my own use, so will keep it.
So, onto the guide. I'm going to make it easy to follow so others can hopefully copy the work.
In saying that, some parts like opening up the system are pretty straightforward and been covered other times on this forum.
Using one of these dpads, got it ages ago from a generic controller. D-pad crosses are usually crosses, however some are on circular blocks like this one.
If you use a normal d-pad cross, a good idea would be to cut out the hole for the cross to go through and move about freely inside, cut the perimeter of the section into a circle, and mount on top of the GP2x case - or of course you could make it integrated and use filler, etc.
Good d-pad crosses are ones from GameCube, Gameboy, Gameboy mini, or as a maximum size, from a NES controller.
I selected the d-pad below from my small box of d-pads as it was just the right size, could retain GP2x case and just cut out the circular hole the old joystick came from, cutting close to the edge of the raised outer part.
So, the GP2x was opened carefully, buttons removed, and the ribbon cable to the screen removed by gently lifting the edge of the brown plug holding the ribbon in place on the GP2x board, using edge of thumb nail - be gentle. The ribbon was then gently attached to the back of the screen with a thin piece of electrical tape so it can be removed easily - point is to protect the ribbon cable from damage. The other reason to separate the screen from the motherboard is so it is easy to remove the joystick and build a replacement d-pad area (with rubber topped tact switches).
Removed the "T" shaped small plastic piece above the cut-out circle as not needed and gets in the way.
Decided not to remove the perspex screen at the front of the case so as not to introduce dust to the screen, also, the case will be spray painted metallic black, so may as well just use electrical tape to protect the screen from the paint when I get to that stage.
Here are two pics of the d-pad in place. D-pad looks nice and moves freely. The d-pad will also be spray painted in metallic black of course.
Before the case is spray painted, going to tape over the screen, and give the case outer a quick and light sanding, to remove any light scratches and also help the spray paint make good on the case.


