You are using an out of date browser. It may not display this or other websites correctly.
You should upgrade or use an alternative browser.
You should upgrade or use an alternative browser.
Ian J
Advanced Member
- Joined
- Aug 27, 2010
- Messages
- 1,880
Excellent site for viewing classic animations from the Amiga (ST & PC)
Artists Like Tobias Richter, Eric W. Schwartz and dozens more
Nice to be able to view these with ease.
http://www.randelshofer.ch/animations/amiga.html
Artists Like Tobias Richter, Eric W. Schwartz and dozens more
Nice to be able to view these with ease.
http://www.randelshofer.ch/animations/amiga.html
Ian J
Advanced Member
- Joined
- Aug 27, 2010
- Messages
- 1,880
Easy to just pinch them off with ESD cutters.
I've never cut caps from the board but would like to be prepared, which of the cutters would you recommend? They range from .7mm to 1.2mm.
http://uk.farnell.com/esd-cutters-pliers
Magic Sam
Forever Homebrew
[OFF-TOPIC]
Hi all
https://www.reaktor.com/blog/crash-course-to-amiga-assembly-programming/
Cheers, Magic Sam
[/OFF-TOPIC]
Hi all
https://www.reaktor.com/blog/crash-course-to-amiga-assembly-programming/
Cheers, Magic Sam
[/OFF-TOPIC]
Ian J
Advanced Member
- Joined
- Aug 27, 2010
- Messages
- 1,880
[OFF-TOPIC]
Hi all
https://www.reaktor.com/blog/crash-course-to-amiga-assembly-programming/
Cheers, Magic Sam
[/OFF-TOPIC]
I don't think it's off-topic, it's Amiga related.
- Joined
- Jan 18, 2010
- Messages
- 11,471
So umm yeah I picked up a new project. I ended up getting an Amiga 2000 desktop, It was sold AS-IS and known not to boot, I wanted a project so I picked this up off eBay. This desktop was introduced in 1987, however this model appears by every date code on the ICs and motherboard likely made in 1988 or early 1989.
It appears the RTC battery on this leaked and caused some damage on the PCB. I spent a ton of time cleaning this up. I had to remove some of the components including the 68000 CPU socket in the damaged area. The CPU itself looks alright, although I did have to polish the pins to remove some of the corrosion. I did the vinegar treatment to neutralize the battery acid on the PCB. I then spent several hours scraping the corroded solder out of the vias, then re-applying fresh solder. The traces look all good, so I think i've fixed the damage. I should have taken picture of the before hand, but I really got into it. Still have some work on this to do, just had time to post what I've done so far.
Still to do:
- Replace CPU Socket
- Replace Resistor networks and Capacitors I had to remove ( Waiting on parts).
- Replace Floppy connector, missing + bent pins.
- Apply a sealant on exposed traces caused by the corrosion.
- Electrolytic Capacitor replacement. ( not priority )
- Test if it works...
Picture from ebay, I ripped it all apart before taking a picture.

8MB memory Zorro II card
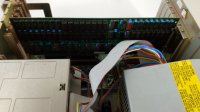
Came in it's original box.

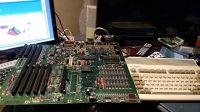
Board is huge next to my Amiga 600.
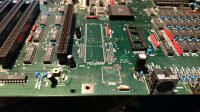
Close view of cleaned up corrosion area after treating the battery leakage. still waiting on parts to replace some of the resistor networks and capacitors I had to lift up. It even got into the keyboard connector, I desoldered it, scrubbed it clean and re-soldered it.
Old socket, some pins pulled out, but shows some of the green alkaline leakage in the socket area.
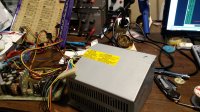
The Power supply was way out of spec, 5V rail was reading almost 7V, the 12V rail was around 9 Volts. I could have tried to do a capacitor replacement, but decided instead of keeping a 30 year old PSU running, just hack in a new ATX power supply into the original PSU casing, however this was a bit more work than I expected. modern ATX supplies lack a -5V rail. No worries, just hack one in, so use the -12V rail and put a -5V regulator (7905). The original supply only provided 300mA on the -12V and -5V rails the ATX supply should handle that without problems.
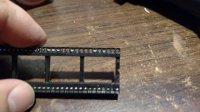
Need a couple of caps for the regulator circuit, only had some SMD variety of the right value. So got inventive.
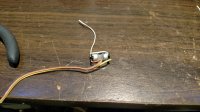
protection diode added
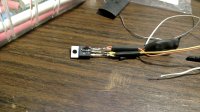
Cleaned up, everything heat-shrink wrapped
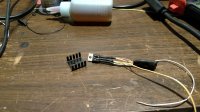
Now in place in the PSU.
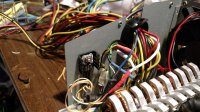
Old PSU innards next to the finished modified.
It appears the RTC battery on this leaked and caused some damage on the PCB. I spent a ton of time cleaning this up. I had to remove some of the components including the 68000 CPU socket in the damaged area. The CPU itself looks alright, although I did have to polish the pins to remove some of the corrosion. I did the vinegar treatment to neutralize the battery acid on the PCB. I then spent several hours scraping the corroded solder out of the vias, then re-applying fresh solder. The traces look all good, so I think i've fixed the damage. I should have taken picture of the before hand, but I really got into it. Still have some work on this to do, just had time to post what I've done so far.
Still to do:
- Replace CPU Socket
- Replace Resistor networks and Capacitors I had to remove ( Waiting on parts).
- Replace Floppy connector, missing + bent pins.
- Apply a sealant on exposed traces caused by the corrosion.
- Electrolytic Capacitor replacement. ( not priority )
- Test if it works...
Picture from ebay, I ripped it all apart before taking a picture.

8MB memory Zorro II card

Came in it's original box.

Board is huge next to my Amiga 600.

Close view of cleaned up corrosion area after treating the battery leakage. still waiting on parts to replace some of the resistor networks and capacitors I had to lift up. It even got into the keyboard connector, I desoldered it, scrubbed it clean and re-soldered it.

Old socket, some pins pulled out, but shows some of the green alkaline leakage in the socket area.

The Power supply was way out of spec, 5V rail was reading almost 7V, the 12V rail was around 9 Volts. I could have tried to do a capacitor replacement, but decided instead of keeping a 30 year old PSU running, just hack in a new ATX power supply into the original PSU casing, however this was a bit more work than I expected. modern ATX supplies lack a -5V rail. No worries, just hack one in, so use the -12V rail and put a -5V regulator (7905). The original supply only provided 300mA on the -12V and -5V rails the ATX supply should handle that without problems.
Need a couple of caps for the regulator circuit, only had some SMD variety of the right value. So got inventive.

protection diode added

Cleaned up, everything heat-shrink wrapped

Now in place in the PSU.

Old PSU innards next to the finished modified.

Last edited:
- Joined
- Jan 18, 2010
- Messages
- 11,471
So they're adding AGA to the Vampire cards, which will make an A500/A600 a viable alternative to owning an A1200.
Thoughts?
Well right now even without AGA it's already faster than any 68k accelerator and most of the PPC based ones. The Vampire has RTG video acting like a Picasso96 card with it's "SAGA" drivers that can drive many of those newer RTG titles. But AGA opens up a ton of the classic AGA titles and demos on machines that never could do it prior.
However the plan is sometime by the end of the year they plan to release a Vampire card for the A1200 and even a MIST style stand alone vampire, both of these will boast a much beefier FPGA and will smoke the current cards.
Last edited:
Ian J
Advanced Member
- Joined
- Aug 27, 2010
- Messages
- 1,880
MIST style stand alone vampire
Nice, looks like I better start saving up.
- Joined
- Jan 18, 2010
- Messages
- 11,471
yeah they haven't officially announced it yet, but I gleamed this information off Gunnar on IRC, the lead Apollo core designer.Nice, looks like I better start saving up.
<BigGun> size 120x100 mm
<BigGun> 2 x db9 (traditional Joystick/mouse ports)
<BigGun> 2 x USB
<BigGun> 1 Ethernet
<BigGun> 1x SDcard
<BigGun> 2 x IDE
<BigGun> HDMI
<BigGun> 3 x expansion port
pmprog
DNF (Did Not Finish)
- Joined
- Apr 25, 2011
- Messages
- 4,150
Whilst it's great that they're supporting the old joysticks, most of mine don't work any more. Do Arduinos support reading from USB HID joysticks? I have a Teensy, and wondering if I could read the joystick from the USB lines and output to a DB9 connector.<BigGun> 2 x db9 (traditional Joystick/mouse ports)
The other downside to that is if you want to buy a DB9 plug, they have metal mounting plates which make it impossible to have two joysticks plugged in (because they're wider than your old joystick plugs)
Still, a standalone Vampire, I'd be tempted with that
I'm not good like @TrashyMG with electronics but i revived my old Amiga 500 with a new PSU.
Seems it's working fine... but not the old floppy (Chinon FB354), disk is spinning but the motor of the head didn't move.


Searching on the net i found this (i have some old spare PC floppy disk to try )
http://www.ianstedman.co.uk/Amiga/designs/Floppy_Adaptor_V2/floppy_adaptor_v2.html
and ordered one.
Now i'm waiting, i'll let you know how good is.
Seems it's working fine... but not the old floppy (Chinon FB354), disk is spinning but the motor of the head didn't move.
Searching on the net i found this (i have some old spare PC floppy disk to try )
http://www.ianstedman.co.uk/Amiga/designs/Floppy_Adaptor_V2/floppy_adaptor_v2.html
and ordered one.
Now i'm waiting, i'll let you know how good is.
- Joined
- Jan 18, 2010
- Messages
- 11,471
Whilst it's great that they're supporting the old joysticks, most of mine don't work any more. Do Arduinos support reading from USB HID joysticks? I have a Teensy, and wondering if I could read the joystick from the USB lines and output to a DB9 connector.
The other downside to that is if you want to buy a DB9 plug, they have metal mounting plates which make it impossible to have two joysticks plugged in (because they're wider than your old joystick plugs)
Still, a standalone Vampire, I'd be tempted with that
I suppose one or both could be reprogrammed as RS232 if the apollo team decided to, but I suspect they are appeasing buyers that plan to shove this in their existing Amiga cases, especially now someone is making new A1200 cases. https://www.a1200.net/
[doublepost=1496073451,1496068762][/doublepost]@Farox , That looks almost like the Mean Well Supply I picked up for my A600, however yours is more compact, I almost wish I found the model you got.
pmprog
DNF (Did Not Finish)
- Joined
- Apr 25, 2011
- Messages
- 4,150
Looks nice, but this suffers the same with the C64 cases (link below), especially if the plan is to construct a new machine, it's going to need a keyboard from somewhere.especially now someone is making new A1200 cases. https://www.a1200.net/
https://shop.return-magazin.de/newsletter/index.html
Looks like that page never got updated though. I'm hoping they'll still be made, and merged with a new mainboard from Individual Computers to give us a totally new machine. This is all speculation, but based on this news post
ClockworkCoder
Chaotic Neutral
It was, I backed it
Wrath Of Khan
Soul soother...
So I'm selling my A1200 http://eab.abime.net/showthread.php?p=1161266#post1161266
That looks almost like the Mean Well Supply I picked up for my A600, however yours is more compact, I almost wish I found the model you got.
Yes it's a Mean Well power supply. The model is RT-50B and is really small (fit inside the original case of my Amiga500 PSU and remain a bit of space).
Similar threads
- Replies
- 2
- Views
- 2K


