Chip
[Insert Custom Title Here]
I dug up my PSP a couple days ago and was disappointed that the battery was pretty much shot. Not wanting to dish out for a proper Sony battery, and having had awful luck with chinese knockoffs, I decided to modify the case to accept a much bigger LiPo cell. Unfortunately, I didn't think to take pics along the way, so this isn't going to be a step-by-step tutorial or anything.

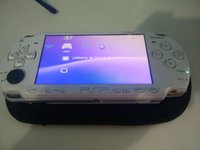
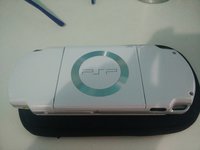
This is what it looks like all put back together. Other than a small chunk I had to cut out of the UMD door, it looks pretty normal.

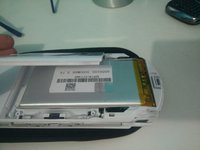
Here's the big 3000mAH battery in place - original (knockoff) battery for scale. It's important to note that the capacity rating on this cell is likely accurate. The 2400mAH rating on the knockoff is an absurd exaggeration. LiPo energy density by volume is a constant. There's no way any stock-sized PSP battery could hold more than about 900mAH, regardless of what they print on the sticker. The big cell is just about the same height and thickness, but a full 3x as wide as the stock cell. This is the cell I bought, in case you want to try something similar.

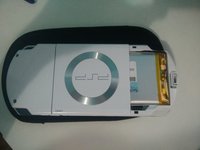
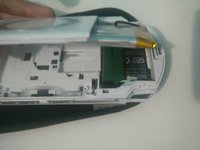
Moving the battery out of the way you can see that this "mod" really isn't all that complicated. Simply remove the UMD drive following any of the tutorials online, cut out the plastic partition between the UMD compartment and battery compartment using some dikes, and you've got a downright cavernous space to fill with lithium polymer goodness. Note that there is a lip on the UMD door that you'll have to shave off as well. That chunk missing from the door in the above pic is where a brace was located connected to that lip.

The only moderately tricky bit is the battery PCB. You need this board to interface with the battery - I'm not sure if it's simply for charging/protection, or if there is some sort of DRM on board, but either way, it's necessary. This pic isn't mine, because I didn't think to take a pic before covering it with tape. In my battery, the red and black wires above were actually metal tape. I carefully cut open the PSP battery case with a razor blade, cut the metal tape between the cell and the board, and removed the board.

Then I unfolded the friction connectors, trimmed them down to simple metal strips, and soldered them to the battery terminals. With the board outputs safely connected, I carefully soldered the wires from the battery to the B+ and B- terminals. Everything was covered in electrical tape for safety, and assembled.
There are two down sides to this mod. The obvious one is that you no longer have a UMD drive. This is no great loss, since PSP .CSOs can be played directly off the SD card. The other is that the battery life remaining estimate will be wildly inaccurate. The little icon will still be OK, but if your battery is 50% full, the PSP thinks it's 50% of a 900mAH cell, not 50% of a 3000mAH cell. In reality, a full charge from a cell this size should provide 10+ hours of hard gaming.
I should probably point out that working with LiPo batteries - specifically soldering them - can be very dangerous. If you accidentally short it out, you can damage the battery, possibly to the point of bursting and starting a fire. Please do not attempt a mod like this unless you're good with a soldering iron.

This is what it looks like all put back together. Other than a small chunk I had to cut out of the UMD door, it looks pretty normal.

Here's the big 3000mAH battery in place - original (knockoff) battery for scale. It's important to note that the capacity rating on this cell is likely accurate. The 2400mAH rating on the knockoff is an absurd exaggeration. LiPo energy density by volume is a constant. There's no way any stock-sized PSP battery could hold more than about 900mAH, regardless of what they print on the sticker. The big cell is just about the same height and thickness, but a full 3x as wide as the stock cell. This is the cell I bought, in case you want to try something similar.

Moving the battery out of the way you can see that this "mod" really isn't all that complicated. Simply remove the UMD drive following any of the tutorials online, cut out the plastic partition between the UMD compartment and battery compartment using some dikes, and you've got a downright cavernous space to fill with lithium polymer goodness. Note that there is a lip on the UMD door that you'll have to shave off as well. That chunk missing from the door in the above pic is where a brace was located connected to that lip.

The only moderately tricky bit is the battery PCB. You need this board to interface with the battery - I'm not sure if it's simply for charging/protection, or if there is some sort of DRM on board, but either way, it's necessary. This pic isn't mine, because I didn't think to take a pic before covering it with tape. In my battery, the red and black wires above were actually metal tape. I carefully cut open the PSP battery case with a razor blade, cut the metal tape between the cell and the board, and removed the board.

Then I unfolded the friction connectors, trimmed them down to simple metal strips, and soldered them to the battery terminals. With the board outputs safely connected, I carefully soldered the wires from the battery to the B+ and B- terminals. Everything was covered in electrical tape for safety, and assembled.
There are two down sides to this mod. The obvious one is that you no longer have a UMD drive. This is no great loss, since PSP .CSOs can be played directly off the SD card. The other is that the battery life remaining estimate will be wildly inaccurate. The little icon will still be OK, but if your battery is 50% full, the PSP thinks it's 50% of a 900mAH cell, not 50% of a 3000mAH cell. In reality, a full charge from a cell this size should provide 10+ hours of hard gaming.
I should probably point out that working with LiPo batteries - specifically soldering them - can be very dangerous. If you accidentally short it out, you can damage the battery, possibly to the point of bursting and starting a fire. Please do not attempt a mod like this unless you're good with a soldering iron.


