Fzero
Advanced Member
- Joined
- Mar 9, 2010
- Messages
- 4,702
So, following on from my question about the joystick and buttons in another thread
[http://boards.openpandora.org/index.php/topic/13444-arcade-controls-question/]
I ordered the parts I needed and decided to give it a shot
You should know, this is nothing pretty, I didn't really plan it as much as I perhaps should've, but from day one it was just an attempt to get a 'working' arcade controller.
I've next to zero experience with woodwork, and this is my first effort at any type of controller.
In hindsight, I know I done a lot of things badly, but in all honesty I'm not that bothered.
I would like to have another go soon, with more planning, and make it look nicer, with some plexi and some nice retro sticker graphics.
So avert your eyes if easily offended with shoddy craftsmanship or anything... this is rough work in amateur hour
Not quite finished yet, but thought I'd post up what I have so far.
In the end, the box I planned to use was not quite large enough for the mobo of the PC I had available to rip apart. So I just spent a fiver on a piece of MDF and cut it up into the same shape but a little larger.
This is the PC I had, used to use it before getting a newer/better one. This is why I thought of tearing it open for use in a controller.
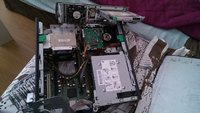
Just unscrewed the board from the base of the PC tower, took out the power button which is sat on that small board top left, along with a couple USB ports on that too.
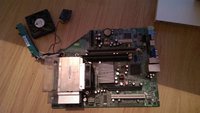
Took out the power supply and the HDD.
That was all I needed really, the PC case got thrown away and I kept all the screws.
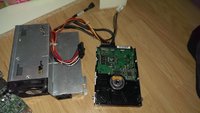
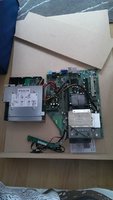
This is the parts laid out on the 12mm MDF so I could see where to cut it. Wanted to keep it small as I could really in terms of depth. Could have placed MOBO the other way [90 degree] to be a bit wider but not as deep, but the short cables from the AC didn't really allow for that.
Once I'd cut the base piece of MDF, I cut this front panel.
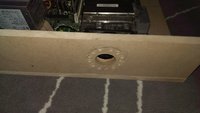
Drilled some holes for the fan to breath.
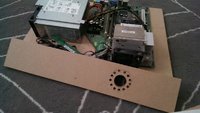
The wood here is about 1cm in front of the fan.
Screwed the board down to the MDF base, just small screws directly through the board into the wood, no chassis plate, not sure if that's ideal but it holds.
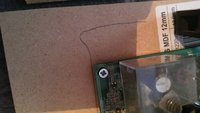
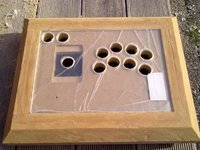
Cut out a few other holes on this front panel.
The small one on left is just large enough to slot my 3.5mm jack into, for headphones.
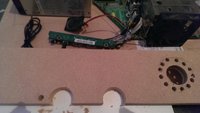
The arch cut on the left allows to access a USB port.
The arch cut on the right allows access to the power button.
This is one thing I would like to change soon, at moment it is a tiny power button and bit fiddly. Would be nice to have a larger button added for easier boot up.
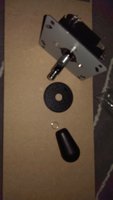
The Sanwa bat top arcade joystick I ordered from the good folks at arcadeworlduk.com
Also got some leaf buttons, went for those as they didn't protrude too much with their built in switches.
I had these bracket things laying around from an old IKEA unit.
Used them just to hold the AC in place, so it didn't rattle around too loose inside.
The black square is a tie-fastener holder, I stuck a couple of them in too and fastened the AC to those. Pretty secure now. I won't be throwing this thing around so good enough
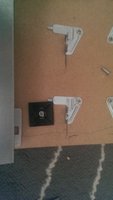
Tie-fasteners in place.
The HDD is just stuck down with some double sided sticker strips... again left overs from an old IKEA unit.
The VGA output is running out the back of the box, shown on the left of this pic.
AC cable hangs out the left hand side, shown on the bottom of this pic.
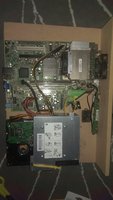
Nice close up of my dodgy tie-fastener fix... ahem... whatever though, it holds
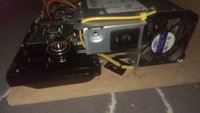
So a couple of the screws used were perhaps a tad too long, 4 of which pierced the base Not even a mm but still enough to scratch whatever table I place this on, so made use of some more IKEA leftovers ... foam sticky pads.
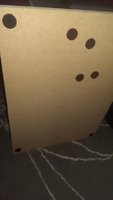
Got the drill bits out and saw. This was done from the template layout on slagcoin.com, though I did shift the joystick over a bit further as seemed more comfortable to me.
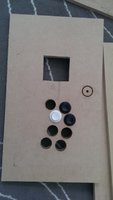
Wasn't going to [wouldn't know how anyway] to cut an insert for the joystick to sink into so was plush with the panel.
Did consider keeping the joystick plate beneath the panel but then it protruded too far underneath and wouldn't have had enough room as it rests above the AC case in the box. So just stuck it on top and by time it sinks through the 12mm MDF only the connectors are showing beneath.
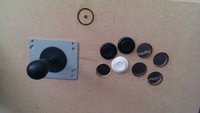
The back panel, another nicely cut shape Just to access the VGA and a few USB ports and ethernet.
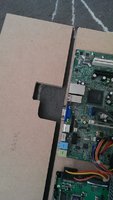
tadaa!
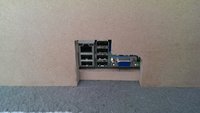
Far as aesthetics go this is it, a lick of orange paint to go with the b&w buttons.
I've got 2 more buttons to add. I have a couple smaller buttons for use here as menu buttons but like a numpty I used the same drill-bit and made the holes too large for them - so will need a couple more buttons.
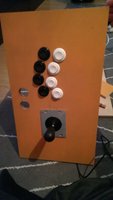
And on the flip side...
Alongside the nice IPAC.
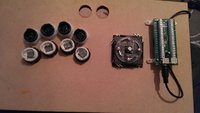
Done a little quick plane cutting on the small top panel so the main control panel MDF could swing on a hinge. Wanted to have it hinged for easy access.
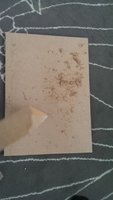
£1.50 on the hinges, my box of IKEA parts let me down here...
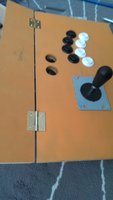
Little bit of MDF glue on the box parts, with nails on the back/base for stability.
It's ok to bash away on though wouldn't want to lean onto it too heavy just now...
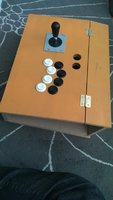
...Need to get the side panels on, which I still need to cut. Will probable add some wood wedges in there too to strengthen.
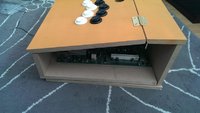
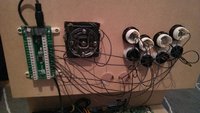
All wired up to the IPAC, remembered to keep a couple connectors free for the 2 missing buttons...
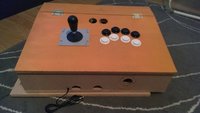
Pretty much done, albeit shabby looking and missing the sides and a couple buttons... but it works and that's what matters.
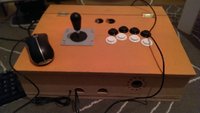
Hooked up the old k/board and mouse so could config my Hyperspin for use with the new joystick and buttons
Power up!
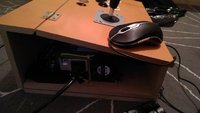
...And it works.
Configured the main menu wheel and my Megadrive emu and all good.
So that's that, I'm most the way done, at least it's working and ready to use.
I'm happy with it, :lol:
[http://boards.openpandora.org/index.php/topic/13444-arcade-controls-question/]
I ordered the parts I needed and decided to give it a shot
You should know, this is nothing pretty, I didn't really plan it as much as I perhaps should've, but from day one it was just an attempt to get a 'working' arcade controller.
I've next to zero experience with woodwork, and this is my first effort at any type of controller.
In hindsight, I know I done a lot of things badly, but in all honesty I'm not that bothered.
I would like to have another go soon, with more planning, and make it look nicer, with some plexi and some nice retro sticker graphics.
So avert your eyes if easily offended with shoddy craftsmanship or anything... this is rough work in amateur hour
Not quite finished yet, but thought I'd post up what I have so far.
In the end, the box I planned to use was not quite large enough for the mobo of the PC I had available to rip apart. So I just spent a fiver on a piece of MDF and cut it up into the same shape but a little larger.
This is the PC I had, used to use it before getting a newer/better one. This is why I thought of tearing it open for use in a controller.

Just unscrewed the board from the base of the PC tower, took out the power button which is sat on that small board top left, along with a couple USB ports on that too.

Took out the power supply and the HDD.
That was all I needed really, the PC case got thrown away and I kept all the screws.

This is the parts laid out on the 12mm MDF so I could see where to cut it. Wanted to keep it small as I could really in terms of depth. Could have placed MOBO the other way [90 degree] to be a bit wider but not as deep, but the short cables from the AC didn't really allow for that.

Once I'd cut the base piece of MDF, I cut this front panel.
Drilled some holes for the fan to breath.

The wood here is about 1cm in front of the fan.

Screwed the board down to the MDF base, just small screws directly through the board into the wood, no chassis plate, not sure if that's ideal but it holds.

Cut out a few other holes on this front panel.
The small one on left is just large enough to slot my 3.5mm jack into, for headphones.
The arch cut on the left allows to access a USB port.
The arch cut on the right allows access to the power button.
This is one thing I would like to change soon, at moment it is a tiny power button and bit fiddly. Would be nice to have a larger button added for easier boot up.

The Sanwa bat top arcade joystick I ordered from the good folks at arcadeworlduk.com
Also got some leaf buttons, went for those as they didn't protrude too much with their built in switches.

I had these bracket things laying around from an old IKEA unit.
Used them just to hold the AC in place, so it didn't rattle around too loose inside.
The black square is a tie-fastener holder, I stuck a couple of them in too and fastened the AC to those. Pretty secure now. I won't be throwing this thing around so good enough

Tie-fasteners in place.
The HDD is just stuck down with some double sided sticker strips... again left overs from an old IKEA unit.
The VGA output is running out the back of the box, shown on the left of this pic.
AC cable hangs out the left hand side, shown on the bottom of this pic.

Nice close up of my dodgy tie-fastener fix... ahem... whatever though, it holds

So a couple of the screws used were perhaps a tad too long, 4 of which pierced the base

Got the drill bits out and saw. This was done from the template layout on slagcoin.com, though I did shift the joystick over a bit further as seemed more comfortable to me.

Wasn't going to [wouldn't know how anyway] to cut an insert for the joystick to sink into so was plush with the panel.
Did consider keeping the joystick plate beneath the panel but then it protruded too far underneath and wouldn't have had enough room as it rests above the AC case in the box. So just stuck it on top and by time it sinks through the 12mm MDF only the connectors are showing beneath.

The back panel, another nicely cut shape

tadaa!

Far as aesthetics go this is it, a lick of orange paint to go with the b&w buttons.
I've got 2 more buttons to add. I have a couple smaller buttons for use here as menu buttons but like a numpty I used the same drill-bit and made the holes too large for them - so will need a couple more buttons.

And on the flip side...
Alongside the nice IPAC.

Done a little quick plane cutting on the small top panel so the main control panel MDF could swing on a hinge. Wanted to have it hinged for easy access.

£1.50 on the hinges, my box of IKEA parts let me down here...

Little bit of MDF glue on the box parts, with nails on the back/base for stability.
It's ok to bash away on though wouldn't want to lean onto it too heavy just now...

...Need to get the side panels on, which I still need to cut. Will probable add some wood wedges in there too to strengthen.

All wired up to the IPAC, remembered to keep a couple connectors free for the 2 missing buttons...

Pretty much done, albeit shabby looking and missing the sides and a couple buttons... but it works and that's what matters.

Hooked up the old k/board and mouse so could config my Hyperspin for use with the new joystick and buttons

Power up!

...And it works.
Configured the main menu wheel and my Megadrive emu and all good.
So that's that, I'm most the way done, at least it's working and ready to use.
I'm happy with it, :lol:
Last edited by a moderator:


