arcade controls question


Fzero

Advanced Member
Joined
Mar 9, 2010
Messages
4,702
Question for those who've built a cabinet or controller...


With typical joystick and button brands, what depth can the face plate be?


I'm wondering what the thinnest could be really, still being able to hold the buttons firmly though.


If the joystick was to rest on top of a cut out hole, I guess it doesn't matter for that... but I'm thinking the buttons probably do rely on the wood face plate they cutting into to be a certain [minimum] depth


Amiright?


PS: mods, I'm on mobile and in the 'questions' forum there wasn't the 'new thread' button. Not sure if that's meant to be like that or not
 
Last edited by a moderator:
tumblr_lvom1ql4kN1r19flio1_250.gif


Just need to Mr Bump this one up please, I know someone here can answer me this once seen :)

Looking at ArcadeWorldUK, formally Gremlin Solutions, and looking at these type joystick and buttons:

JLF-TP-8YT-SK-black__00196_std.jpg
 
classic-arcade-button-2-black__62499_std.jpg


I plan on placing them into a fairly thin piece of wood, around 6mm - 10mm thick only.

Will they rest in that ok or do you have to use something considerably thicker?

Looking at the buttons, I think that threaded section is the maximum depth the wood could be, and that rim around the base will screw up the thread to clamp in place ... I think ... If that is right, it looks like you could attach them to a thin piece of wood.
 
If you want old school feeling, go for happ controls : concave buttons and "bat" or balltop joystick. - like the ones you found on ebay -
If you want really good controls, go for Sanwa or Seimitsu controls!

You have two options for your control panel :
1) using a metal plate : it allows you to get short joysticks and snap-on buttons. But it's hard to pierce if you don't have the required tooling.
2) using a piece of "wood", MDF is really nice to work with even if it's hard. If you choose MDF, be careful, it's full of glue so wear a mask when you're cutting it. Since MDF is hard, you can go for a thin piece, if it bends when you're playing, add a cleat. Depending on the depth of the wood, you might have to buy long joysticks. For buttons, you'll definitely need threaded ones.
 
Last edited by a moderator:
Theres a few good companies for buttons and sticks (though I also tend to go Happ if I buy new. I did pile up on NOS sticks and buttons from years ago =) ..

(I actually really like 'leaf sticks' and buttons from 30 years ago, for old shmups; the digital controls are for horizontal or 'newer' games .. the oldest games use leaf, so I use leaf for them; For an emu cabm use digital naturally ;)

Anyway, You can use anything you want for depth, up to how it feels for you. Most machines used half inch thick wood, but I've seen simple mm-thick metal too (think cookie sheet); the sticks are mounted from beneath so don't care (just a bolt is visible from the outside/top), and the buttons use the screw up neck to hold them fast, so can accomodate very thick to very thin.

So its all about feel not mechanical limitations.

6mm would be strong enough for a small tabletop personal unit, but probably not strong enough for somethinh that will take a beating. If its for home use, I wouldnt' worry too much.. but I like to build them like a tank :)

jeff
 
Excellent!

Thanks guys!

:)

This is what I wanted to hear, that I could use a thinner piece of wood/MDF.

I'll consider the type of buttons/joystick more later, for now I was concerned if the depth of wood I planned to use would be ok, which it seems it is then.

It looked like they just screwed in but wasn't certain as I normally only ever see the top section of these controls eh :)

Plus when you see peoples builds and do get to see the underside, most people do use the half inch thick wood ... which is why I wasn't so sure.

All good though.

I'm actually planning on stripping an old PC I have which currently runs Hyperspin, I've got a few emulators configured well with a USB gamepad on it.

I want to ditch the gamepad.

Plan to open the PC, [carefully] remove all the parts and re-house them within a control box - so will have an all-in-one at the end of it hopefully :)

Get the iPac2 USB model to wire the buttons up to.

Guessing once I open the PC and remove the mobo, cpu, fan, hdd, etc.. I can cram them in wherever they'll fit, fastening them to the unit somehow.

Will be a bit of a dodgy looking effort I'm sure, nothing too professional looking, but hopefully it will work - Thats all I care about really.

Just want to have it all in one portable [just about] box which I can carry from room to room and hook up to my tellies in bedroom or front room.

Thanks again
 
I've always wanted to make my own MAME control panel so would be interested if you could document your progress on the forum.

Do you have any plans to add specialist controllers trackball/spinner?
 
No plans for a trackball, I have considered adding some buttons to the side for the odd pinball game use.

I will document the process, though as I said it will not be a pro effort by a long shot :) Just thought I'd give it a go and if I ruin the PC in trying, no big deal, I have the hdd backed up and that is the main component. Could source more parts and try again. I often get the chance to pick up old PC towers for nothing.

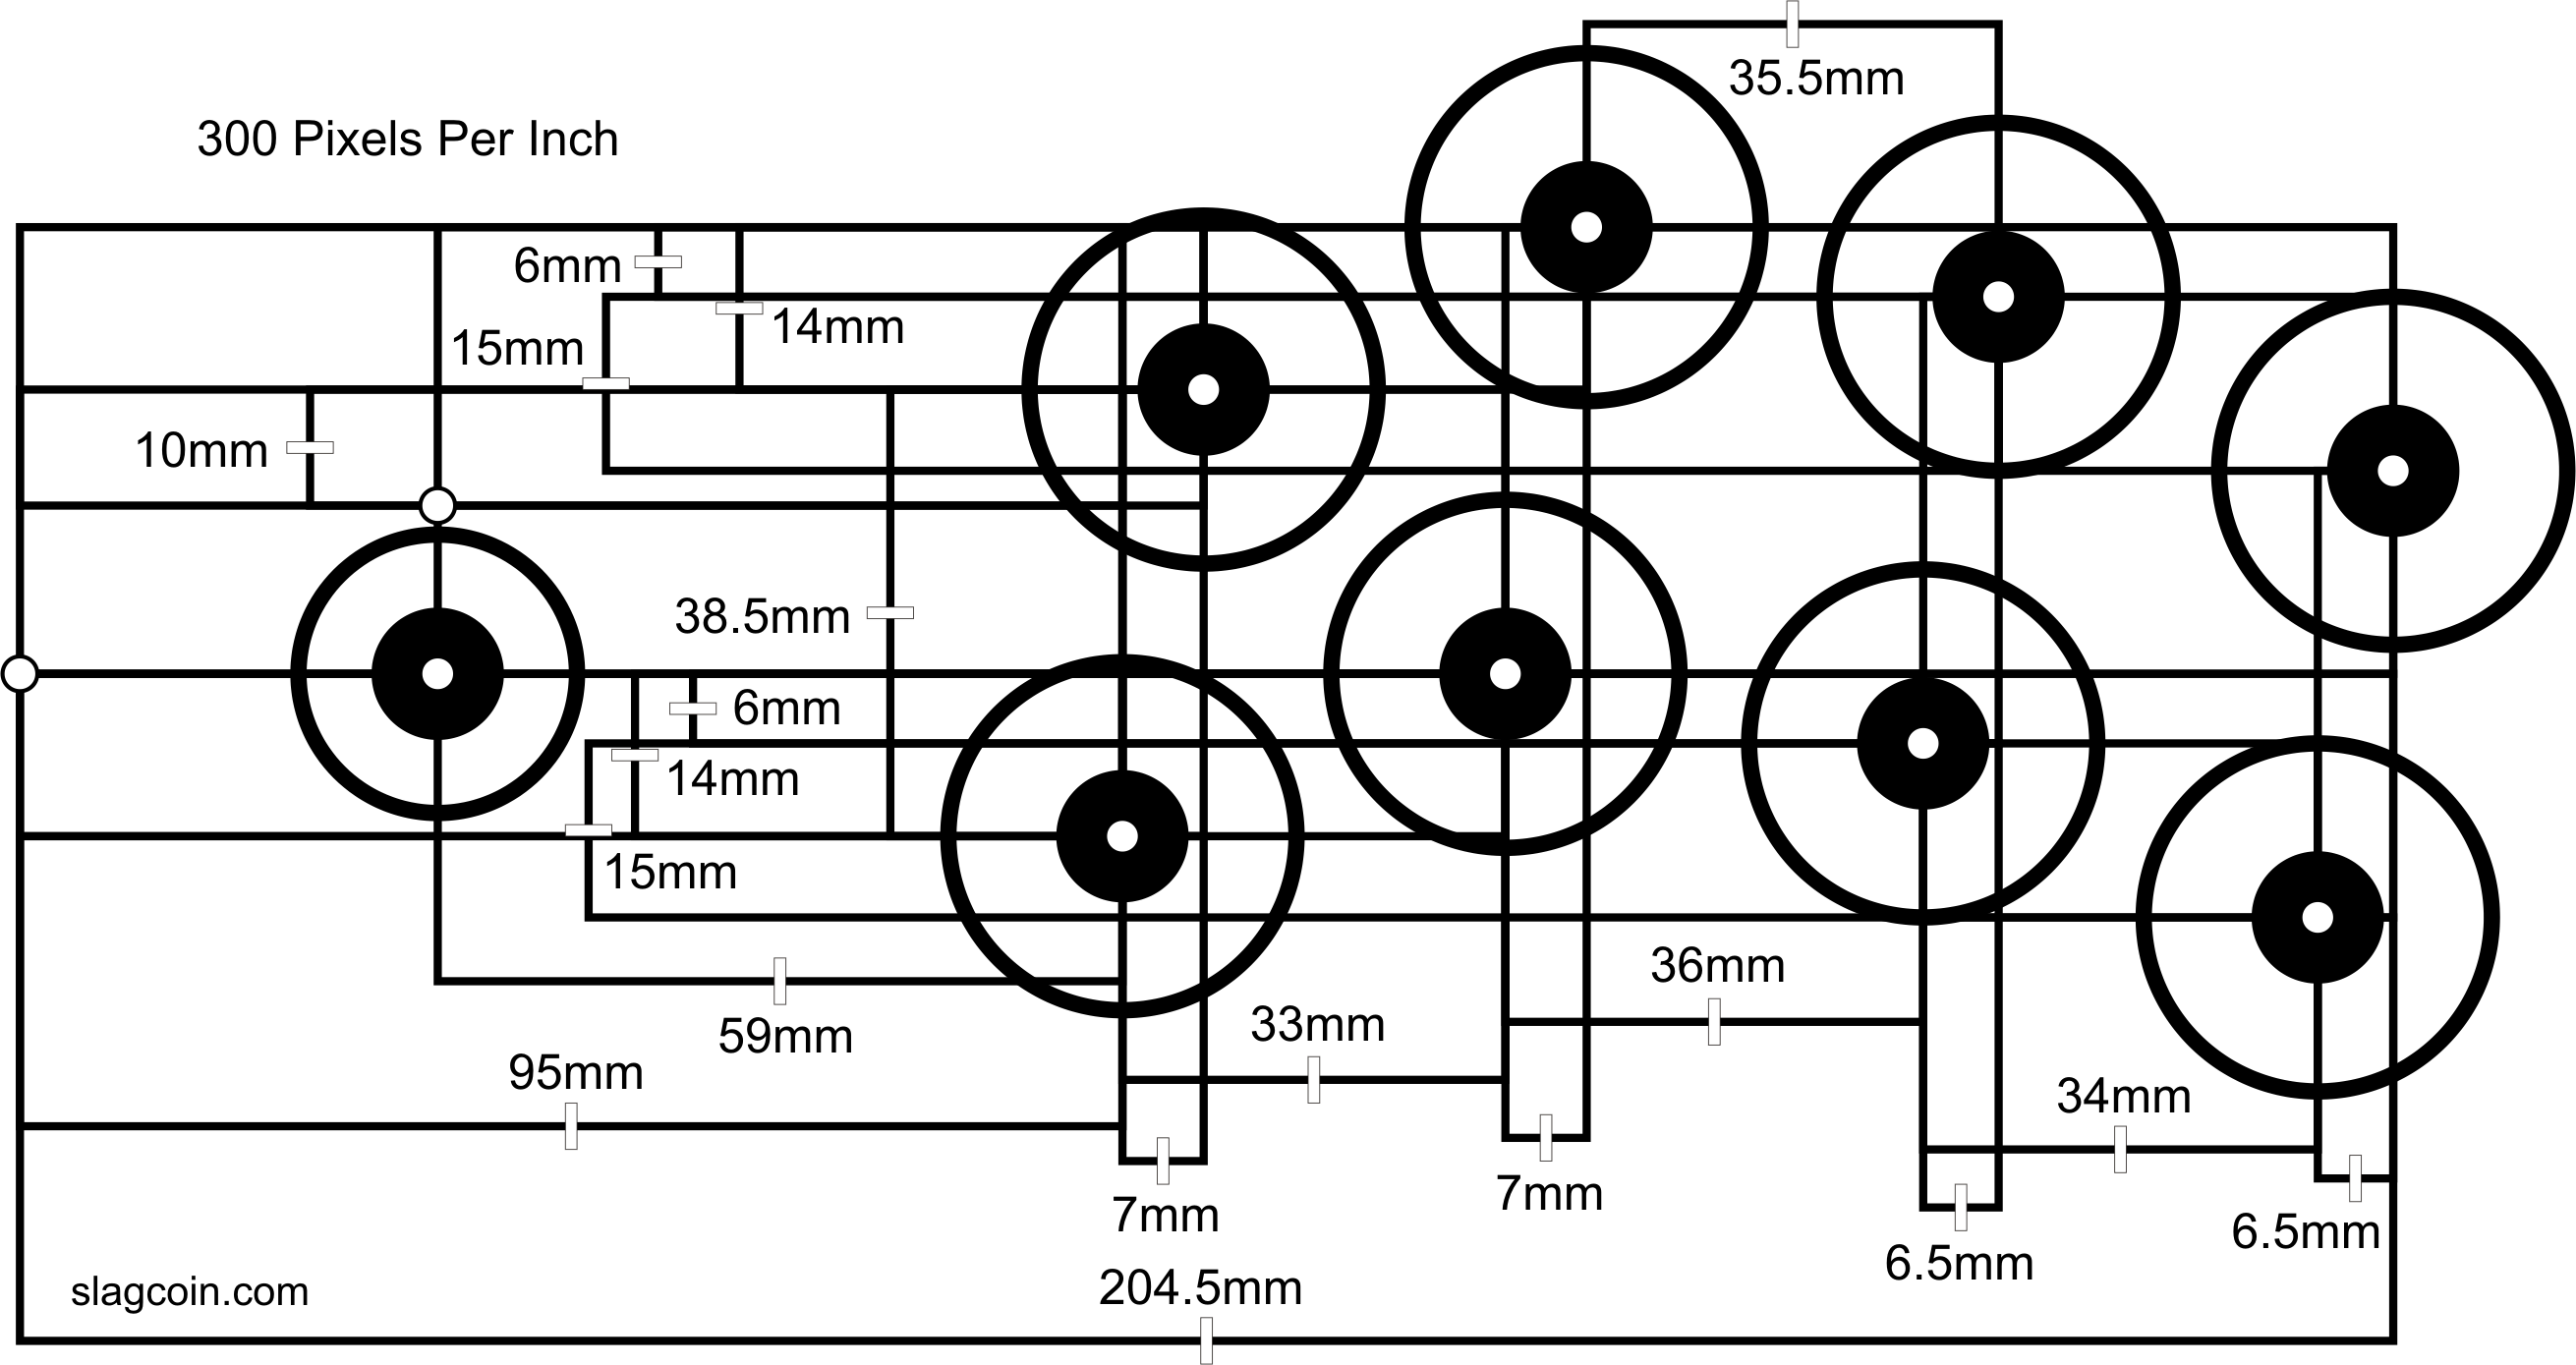
I'm not even building the wooden box, I did drill some holes into a piece of MDF based on the Sega system, from plans sourced off Slagcoin, but then just as I was about to get more wood to make the box, I thought about using an old work box which has the hinge in place, pretty much a good angle for what I want, so figured would be easier to use that and just drill new holes into that lid --- which is thin --- hence my asking about it here.

I will take notes though and some pics then do a new thread on it once got somewhere with it :)

Using this as template for drilling:

sega1_l.png
Sourced and printed to scale from: http://slagcoin.com/joystick/layout.html

And using a desk a lot like this one, which is just a random image found on a google search, but mine is same but has a hinge on so the lid flips up easy:

Shaker-writing-desk_2008.gif


I might need to extend the height more, depending on how much room I need to cram in the PC parts ... but I'll decide that once I have taken the PC apart and seen how it's looking.
 
Nice :) Same as the little cheapo joystick-tv-games you can buy, but with a general purpose PC inside and giant.

Fun project :)

(alternatively.. use an r-pi :eek: )
 
Last edited by a moderator:
Ok, got a question about the wiring up of a joystick...

Have 3 connectors for each up/down/left/right.

They indicated as:

NC

NO

C

Not certain which connectors on the joystick I include in the ground daisy chain that connects the buttons and ipac. I think it is the 'C' ones are ground.

And which connectors on the joystick link to the up/down/left/right connections on the ipad. I think this is the 'NO' ones, [normally open].

Is that correct? What about the 'NC' ones [normally closed]. Need to hook anything up to those too?

Also, the ground [C] connector on the joystick is just a small connector with an eyelet/hole. Can just wrap I wire round this I guess, so long as fixed securely

For image reference, black line being the ground, that's what I plan to do if correct:

qq3jhs.png


cheers
 
Back
Top