3D printing a Pandora case


carpman

Still Fresh
Joined
Jul 29, 2014
Messages
6
Age
43
Location
Dallas, TX
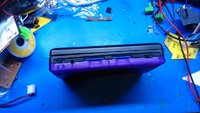
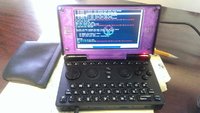
So I'm either brave, stupid or both. I've decided to 3D print a case for my perfectly good Pandora. Here is the result of phase one. Its challenging printing parts that were designed to be injection molded, but I think it came out rather well. Removing the support was... Difficult. It has the added benefit of upping the lid friction, so now I can stand the screen up when I'm watching videos at lunch.
IMG_20141114_085228.jpg
 
Booth, but thx for sharing anyway.

Its good to see that it works and does look even good.
 
Are you making the other parts too? If the result is fine i could imagine some here would pay you for a custom case...
 
nice job, it's however the easiest part... I hope you'll manage something for the other parts...
 
Its a makergear m2 body with printrboard electronics and an E3D v6 hot end with a .4 mm nozzle. Printed in ABS.
 
Cool, looks like one of those decepticon transformer colours.

Is the crossed texture part of the design, or does it print out that way (for strength)?

are how did you get the CAD for that part, are they somewhere, or did you 3D scan it?
 
The files are open in the Wiki... Fully open and such.
 
Is the crossed texture part of the design, or does it print out that way (for strength)?
3D printers print layer by layer, it looks like he used a cross pattern fill. Yes, It prints one layer in one direction and then switches direction to give it extra strength.
 
Last edited by a moderator:
Yep, crossed infill is the default. Its more visible in this filament since its translucent. Printed straight from the files without modification.
 
Yep, crossed infill is the default. Its more visible in this filament since its translucent. Printed straight from the files without modification.
Impressive, I saw those files and didn't think they would print well at all.. I haven't printed much that needed support material yet on my printer.. I typically design things myself to be support-less.
 
Last edited by a moderator:
nice print.  are you planning on adding any modifications other than what might be required to print it? I'm wanting to try a L2/R2 mod using 3d printed parts
 
Congratulations, from one who watches without any likelihood of actually doing it.

( but I do belong to a group of interested people based in SW Western Australia).
 
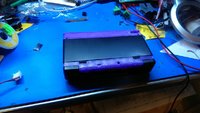
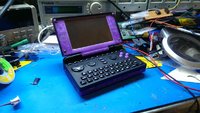
So, more progress (sorry for the messy bench, up to my eyeballs in projects right now).

As you can see I'm avoiding the keyboard area, its going to be a rough print no matter which way I do it. Coming a long better than I expected. I put the purple buttons on, but I think I'm going to switch them out with ones printed in the color pattern from the Japanese SNES.

Not looking to add functionality (yet), just swap out the case. I was going to do the d-pad, but its attached to the keyboard mat.

IMG_20141116_203856.jpgIMG_20141116_203848.jpgIMG_20141116_203837.jpg
 
print's out pretty nicely I'd say. I'm also eager to see how the keyboard area will comes out...
 
I think it looks nice as it is, but acetone would work for those who don't like things so rough.  I would be cautious, though, since you don't want any warping or misalignment.
 
Back
Top