Terran
Active Member
- Joined
- Oct 30, 2009
- Messages
- 527
- Age
- 33
EvilDragon [Englischer Beitrag] said:Well, as mentioned, the case is nigh finished I just received the new case files yesterday.
Here are some pictures straight from FreeCAD for you
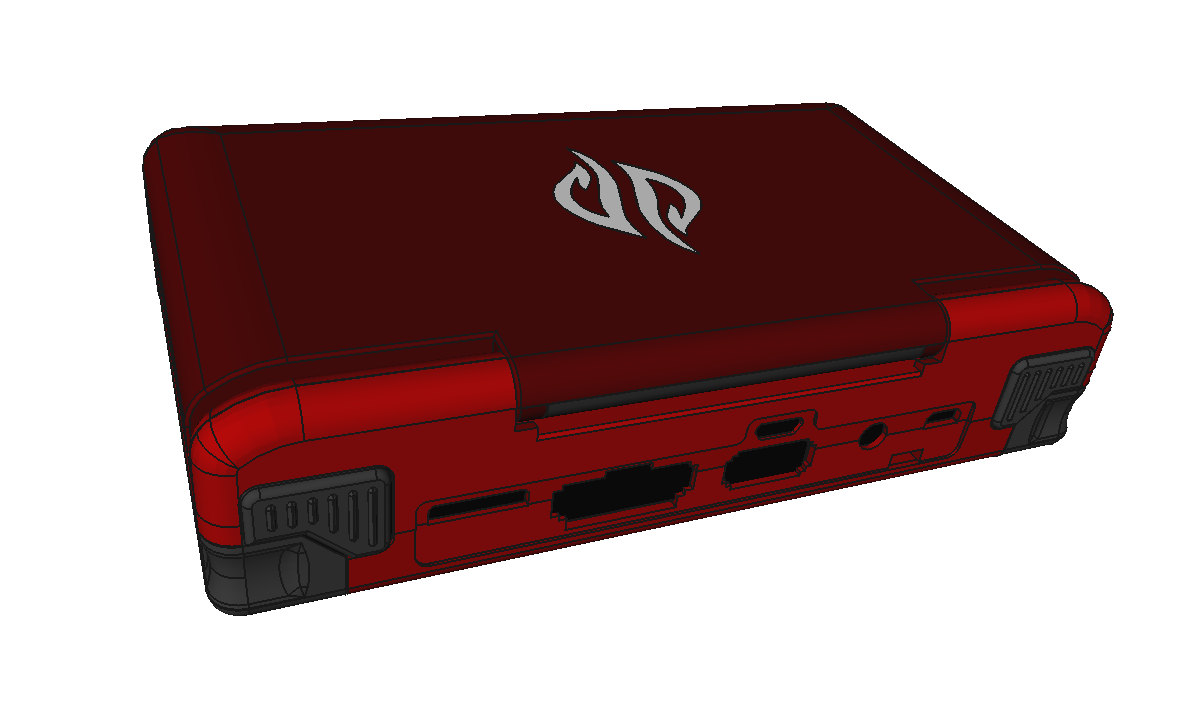
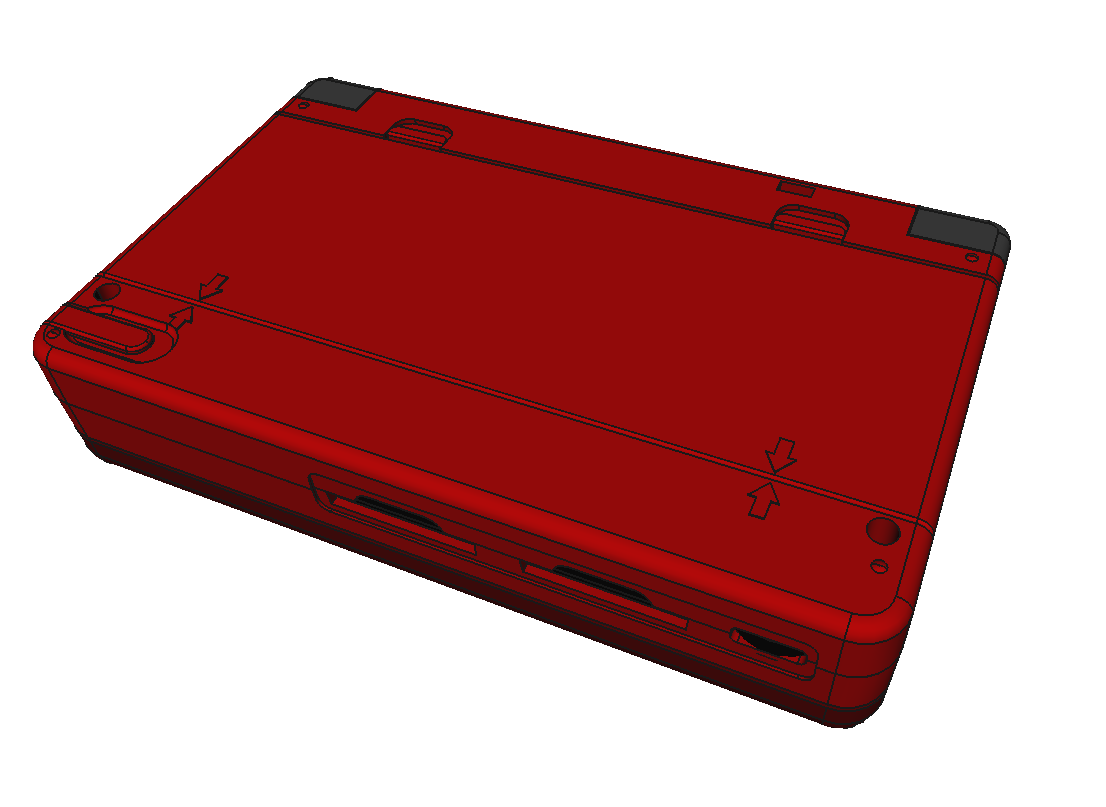
Closed unit, you can clearly see the shoulder buttons, all connectors as well as the SD Card Slots and the Stylus.
[Bild in der Übersetzung]
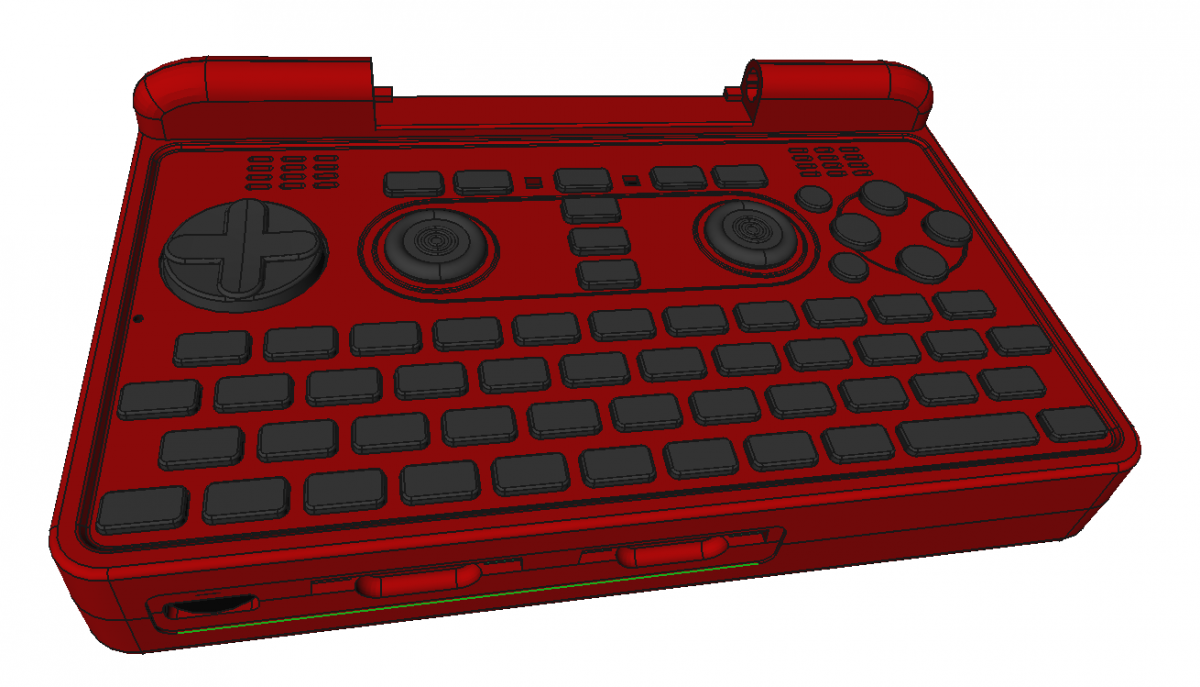
Here's the keyboard part and the lid with the LCD.
[Bild in der Übersetzung]
If you take a closer look at the LCD, you can see that there are two dummy screw slots - that's because part of the display is below that area.
That side will be clipped, whereas the other side will be screwed (same as the lower screw).
We'll have bumpers in there so you can't see that.
This way we can make the frame as small as possible, keep it sturdy with the screws and make sure we don't use too many clips.
Here's the inner part of the keyboard part:
[Bild in der Übersetzung]
Nothing too special, but the enclosement of the speakers is important for a good sound, can't wait to try them out
Next let's take a closer look on the shoulder buttons:
[Bild in der Übersetzung]
The first picture shows them without the PCB. Really sturdy buttons should be really hard to break.
As you can see with the second picture, the plastic case will also stop the buttons before they can hurt the switches on the PCB.
That should make everything very robust as well.
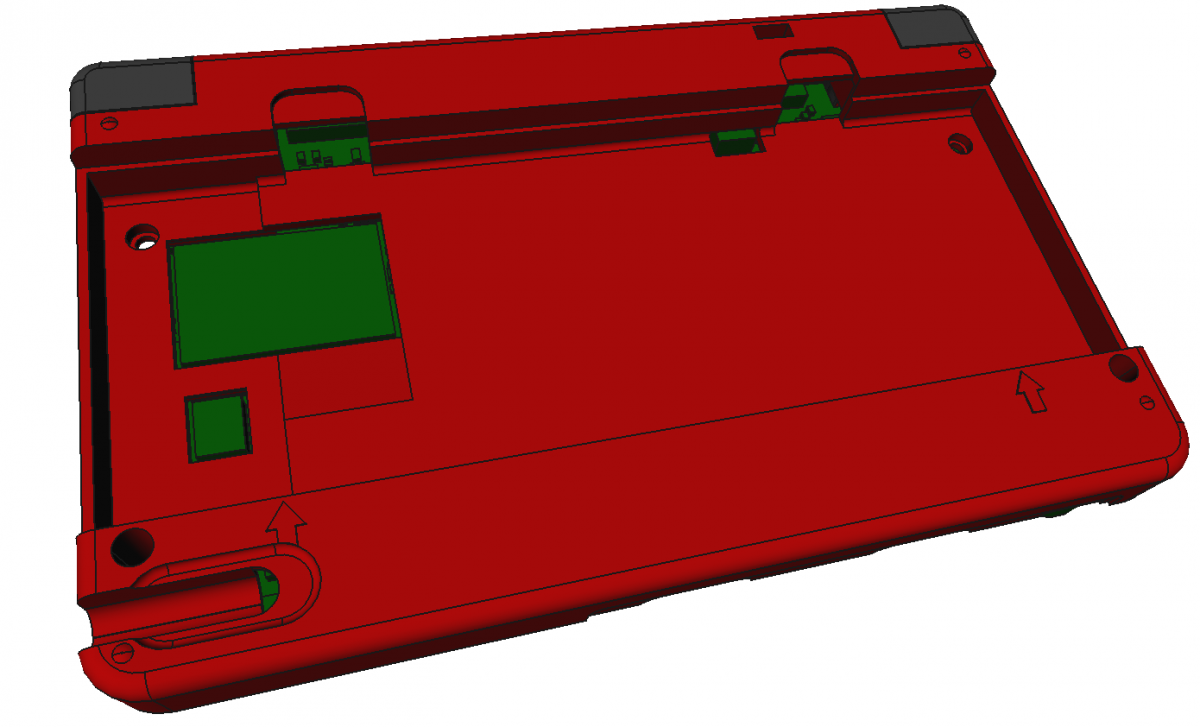
Here's a last picture for you, showing where the SIM Card will be:
[Bild in der Übersetzung]
Some notes about the hinge:
The hinge part we'll use will be the same as in the Pandora, however, the hinge area will be changed a bit.
First, some background about my thoughts:
What's good with the current hinge design is that it snaps open and snaps close.
That's important and better than laptop friction hinges, which are stiff but don't really close well (unless you use some locking mechanism).
Our ideal hinge would be one which snaps open and close and has some friction added inbetween.
That's what we're trying to do here - using one simple trick.
The opposite side of the hinge (where the LCD Cable goes through) won't have a perfectly round hole and peg, but a slightly oval one.
That way, once you open it a bit, it has some friction - and when you're near 180°, the friction goes away again.
We need to try and tweak it a bit, but it should work out pretty well.
Übersetzung said:Wie bereits angemerkt, ist das Gehäuse nahezu fertig. Ich habe die neuen Gehäusedateien gestern bekommen.
Hier sind einiger Bilder direkt aus FreeCAD für euch
Das geschlossene Gerät, ihr könnt klar die Schulterknöpfe sehen und alle Anschlüsse, sowie die SD-Karten Slots und den Stylus.
Hier ist die Tastatur und der Deckel mit dem LCD.
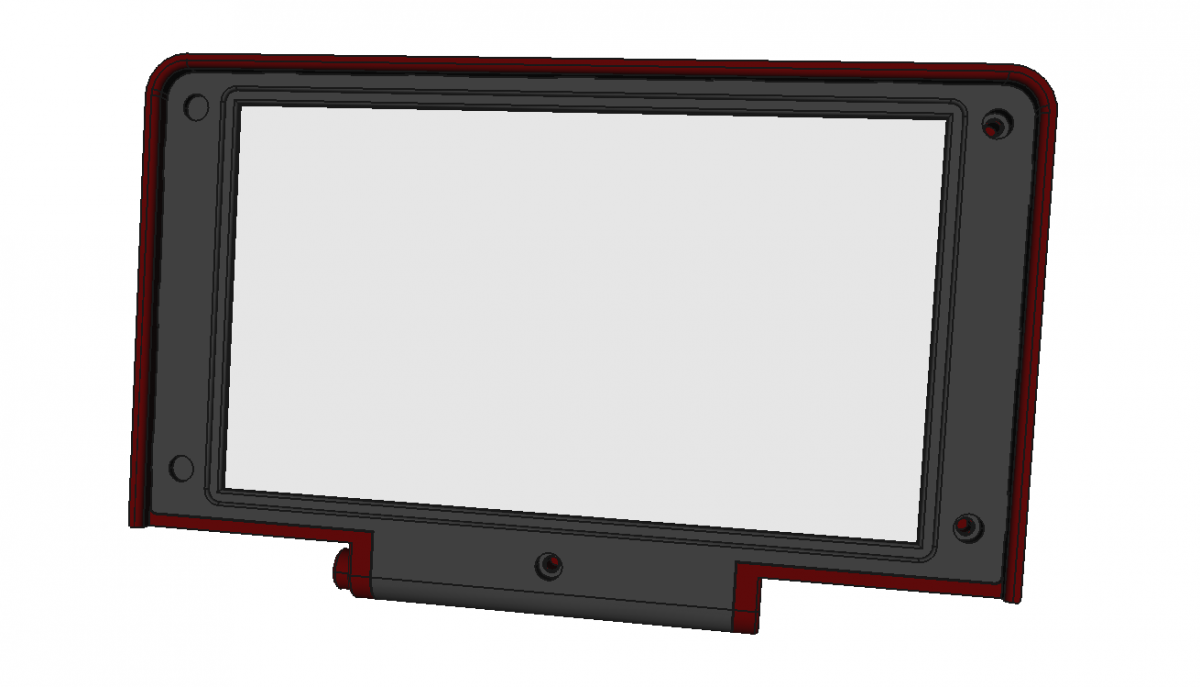
Wenn ihr genauer auf den LCD schaut, könnt ihr die Zwei Dummy-Schraubenlöcher sehen - das ist, da Teile des Displays teilweise darunter liegen.
Diese Seite wird mit Clips gehalten, hingegen auf der Anderen Seite geschraubt wird (sowie das untere Schraubenloch).
Wir haben Abdeckungen, damit ist das nicht sichtbar.
Auf diese Weise können wir das Gehäuse schmal machen und dennoch stabil, wir verwenden auch nicht zu viele Clips.
Hier ist der innere Teil der Tastatur.
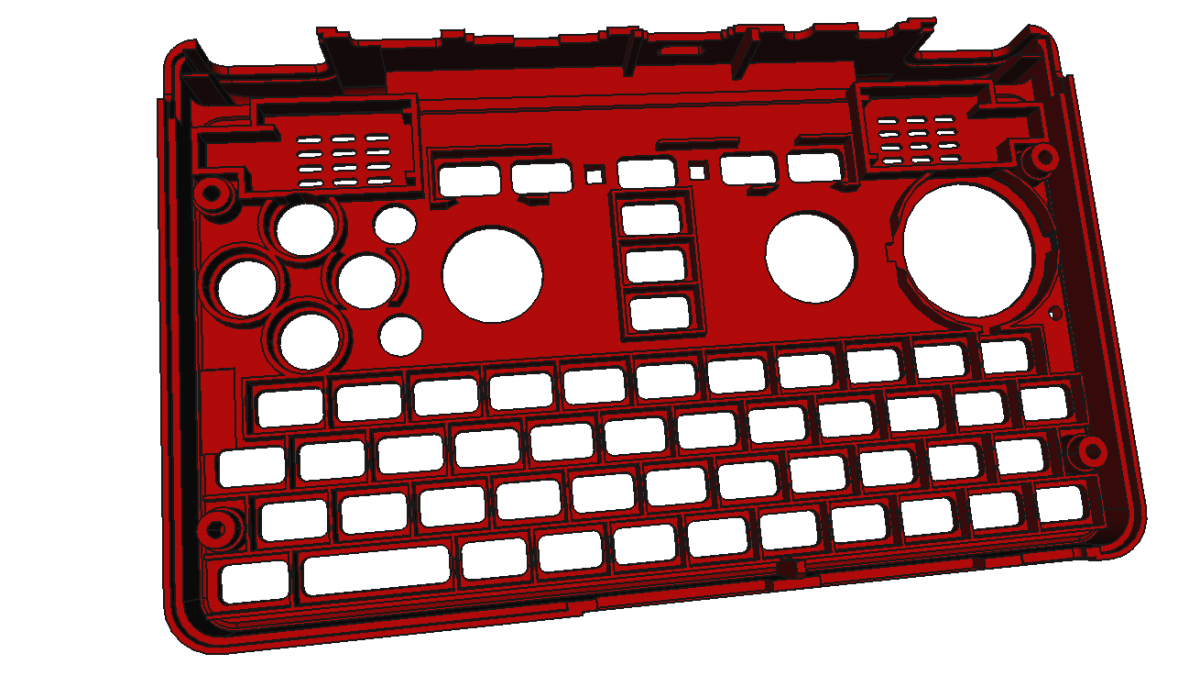
Nichts außergewöhnliches, aber der Bereich für die Lautsprecher ist wichtig, kann es kaum erwarten diese zu testen.
Lasst uns als nächstes einen genaueren Blick auf die Schulterknöpfe machen.
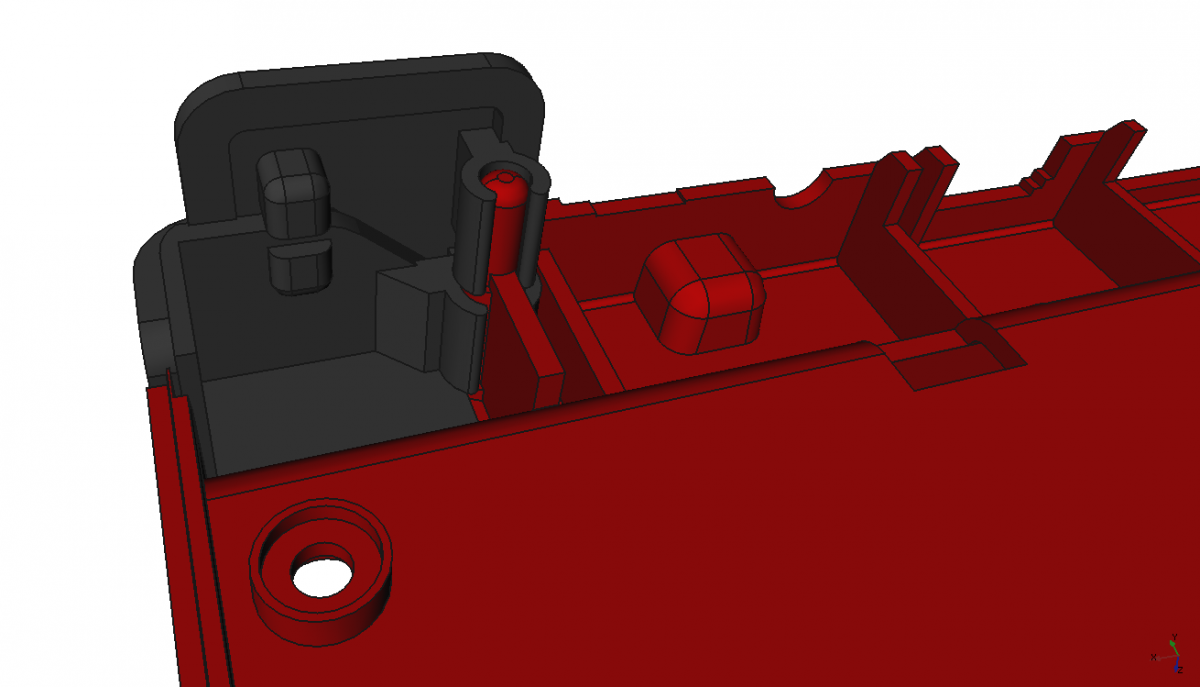
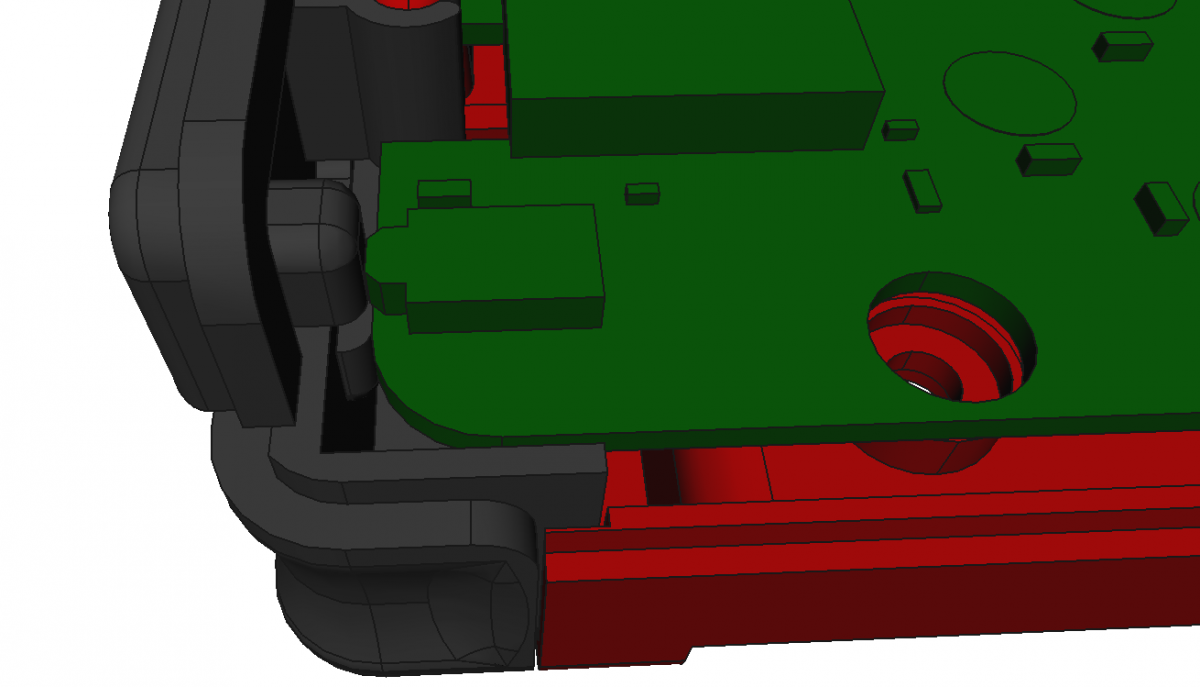
Das erste Bild zeigt diese ohne PCB. Richtig stabile Knöpfe sollten nicht so leicht zu brechen sein.
Wie ihr auf dem zweiten Bild sehen könnt, wird das Gehäuse die Knöpfe stoppen, bevor sie die Schalter auf dem PCB verletzen können.
Das sollte alles sehr robust machen.
Hier das letzte Bild für euch, es zeigt den Sim-Karten-Slot.
Noch etwas zum Scharnier.
Wir werden das selbe, wie bei der Pandora verwenden, es wird aber etwas verändert.
Erst etwas Hintergrund zu meinen Gedanken:
Was am momentanen Design gut ist, dass es offen und geschlossen einrastet.
Das ist wichtig und besser, als Laptop-Scharnier, welche etwas starr sind aber nicht richtig schließen (außer es wird ein Verschleißmechanismus verwendet).
Unser ideales Scharnier rastet offen, geschlossen und dazwischen ein.
Das versuchen wir - mit einem einfachen Trick.
Die andere Seite des Scharniers (dort, wo das LCD-Kabel hindurchgeht) wird nicht perfekt rund sein, sonder leicht oval.
Auf diesem Weg, wenn du es leicht öffnest, hat es etwas Reibung - Richtung 180° geht die Reibung wieder weg.
Wir müssen das noch etwas anpassen, aber es sollte gut funktionieren.
Blog
Quelle

